Steel Spine Stair Installation
Steel Spine Stair Installation
“This blog features the installation steps for one of our ‘floating’ steel spine staircase with oak treads and frameless glass balustrades. The stair features large kite-winder treads at the top and a base channel style glass balustrade to the landing…..”
Below is a step-by-step guide and example spine stair installation with pictures.
The general design comprises:
- Powdercoated box section steel spine with welded tread plates
- 60mm chunky solid oak treads and kitewinders
- 15mm clear toughened glass balustrade
- 50mm diameter stainless steel glazing clamps (powdercoated black)
- 42mm Slotted stainless steel handrail (powdercoated black)
- Aluminium base channel track and matching balustrade
Typical images and pricing : DioMet Steel Spine Staircase
When supplied for DIY installation, all oak treads are routed underneath to suit the tread plates and drilled and fitted with internal ferrules to attach the glass balustrade clamps. Installation method as follows :
Step 1 : Install the top landing bracket.
The style of bracket will vary depending on each individual project, the example however uses two kitewinder treads at the top to bring the entrance to the stair at 90degrees. The landing bracket here is therefore designed to bolt into the corner of the building, with projecting fin plates to attached steel spine.
.jpg)
Step 2 : Attach the steel spine
The pre-fabricated box section spine can now be bolted to the landing plate and secured to the ground. Attach the first tread to ensure the orientation is correct and level before fully fixing.

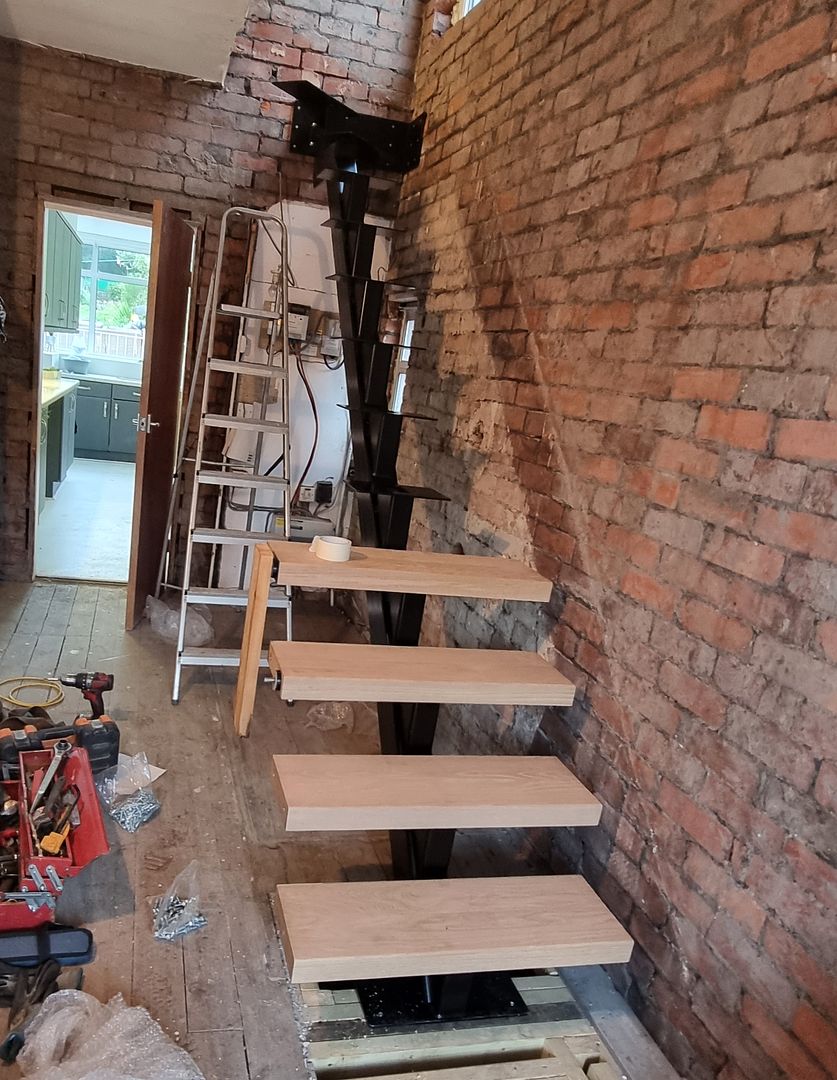
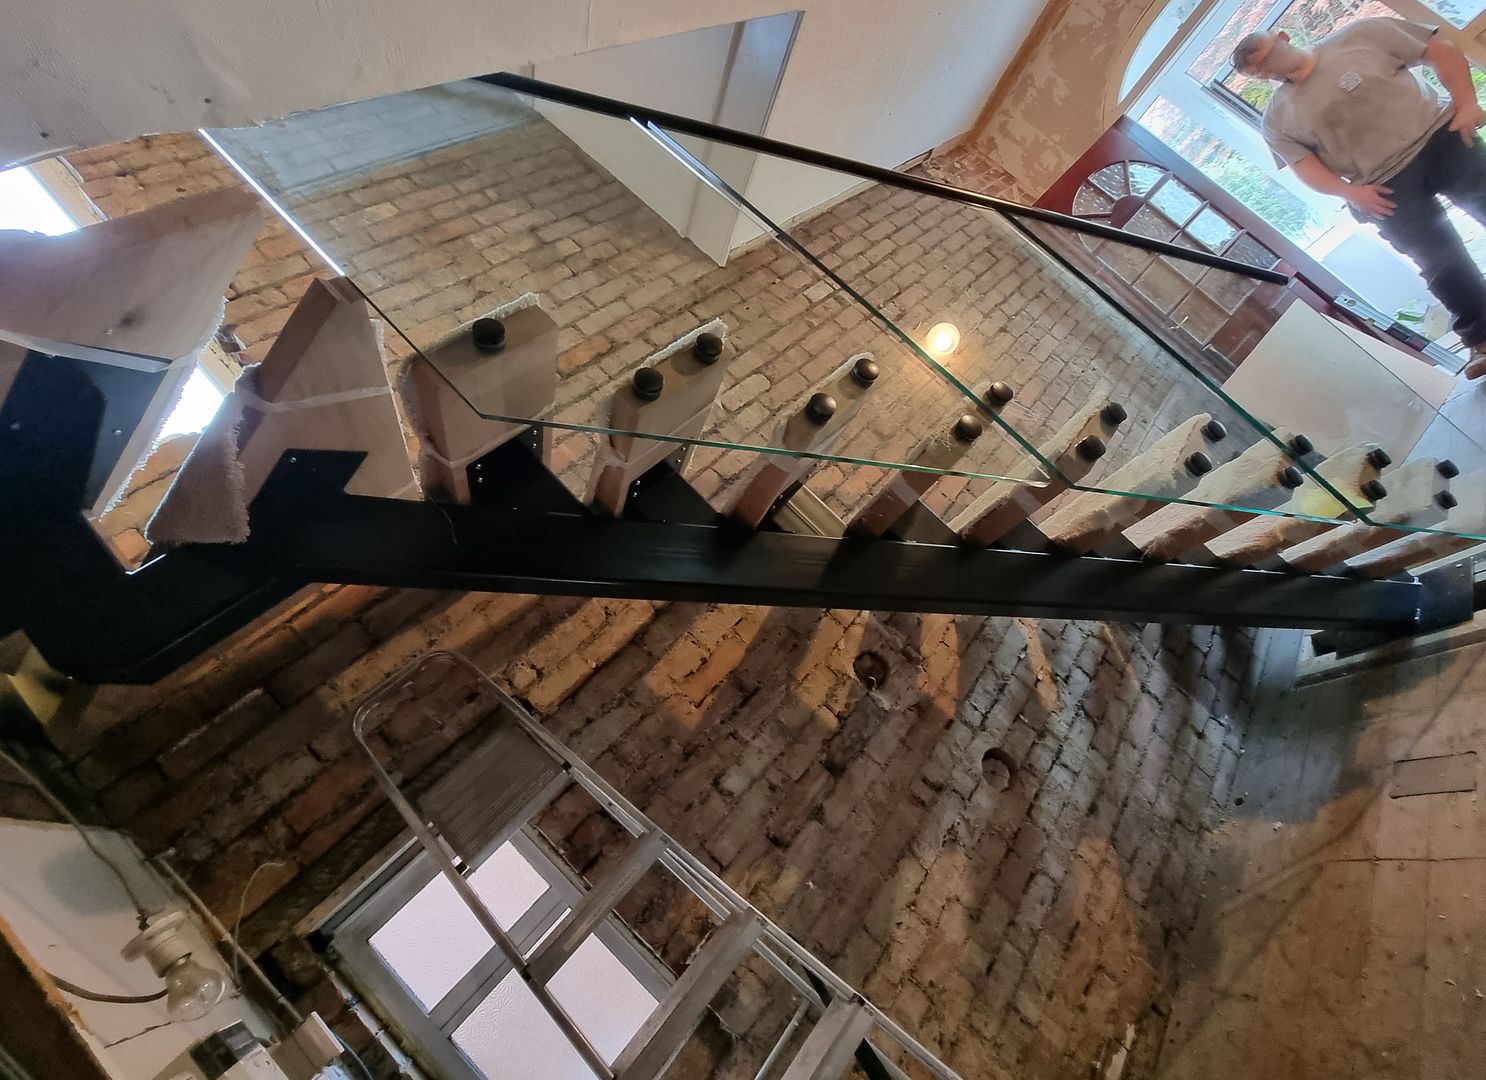
Step 3 : Bolt in the treads and glass.
All treads can now be installed working from the bottom up. The glass balustrade panels can then be offered into position and secured with the proprietary glass clamping system.
.jpg)
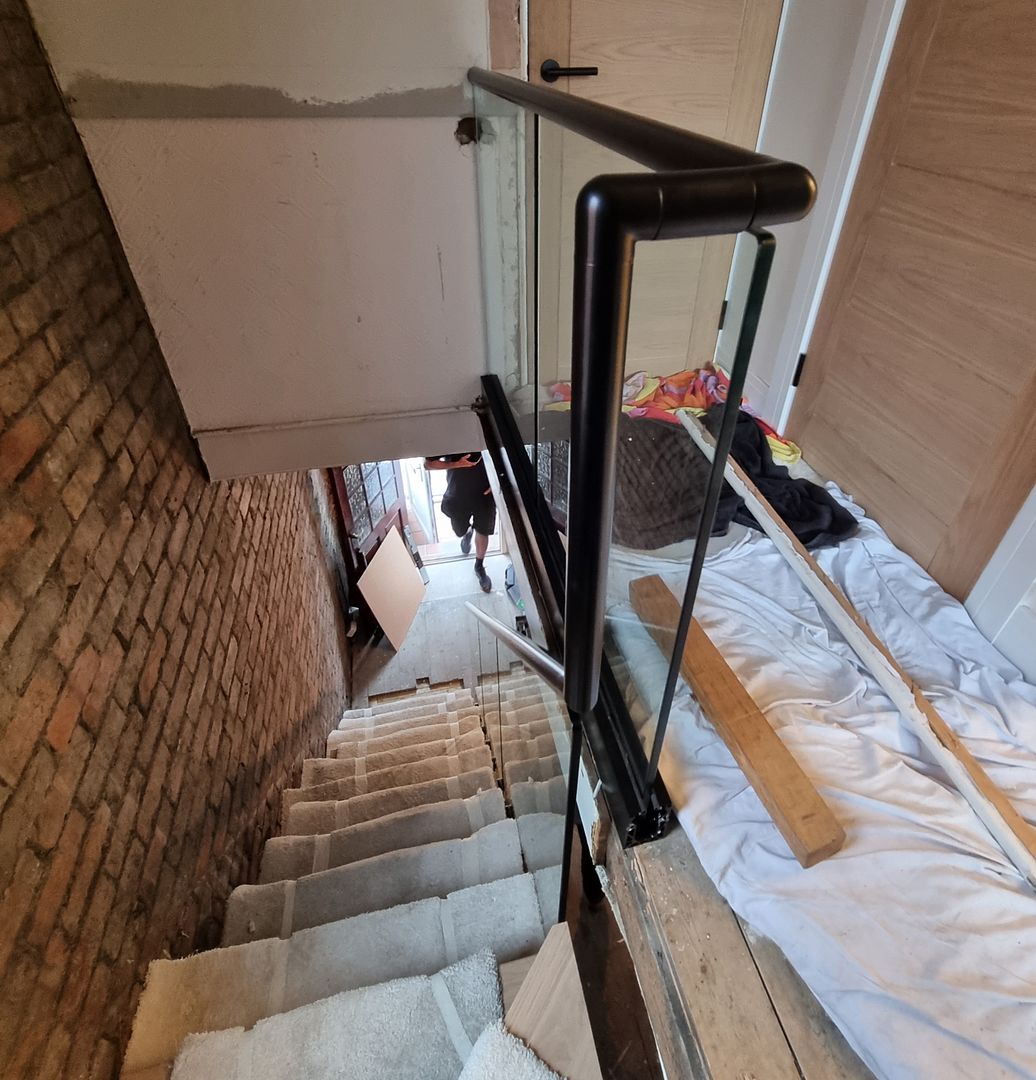
Step 4 : Attach the handrail
The slotted handrail system can then be installed over the glass; a rubber gasket system is used and can be pressed onto the glass. TIP – The gasket and handrail can be tricky to install for a novice so Dio-Met recommend the use of a lubricant such as a washing up liquid to assist and light taps of a rubber mallet where required.
Step 5 : Final touches
Once all items are installed and levelled up. every fixing should be checked and tightened, all glass and metalwork fully cleaned and it is strongly recommended that the oak treads are protected during installation and for use afterwards while any other construction may be underway.
As a general rule of thumb DioMet recommend that all other works are completed in advance of the staircase installation including any plumbing, electrics, plastering and painting to avoid any damages to the staircase and also to avoid having to try and work around it (unlike this example!)
Installation of a steel spine staircase with glass balustrade from DioMet should be a reasonably simple task for any competent builder or tradesperson since the majority of the hard work is completed in the design and fabrication stage, including bespoke machining of the treads.
DioMet supply and deliver bespoke feature staircases throughout the whole UK and offer installation within a 2-3 hour radius of our workshop in Sheffield. Get in touch to discuss your steel spine oak tread staircase project! Typical images and pricing : DioMet Steel Spine Staircase
Contact us with your floating glass staircase enquiries on 0114 243 9009 or email us sales@diometonline.co.uk
Please login to Comments