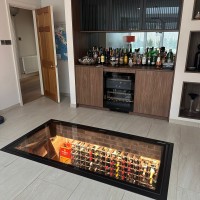
Installing an Electric Glass Floor Hatch
Dio-Met’s electric hinged glass floor system is designed with ease of installation in mind; the unit is supplied fully assembled and ready to ‘drop’ into a pre-prepared floor void and all electrics are pre-programmed into a very clever control box unit, powered by a standard UK plug.
Whilst of course we supply a full installation and operation manual with each order, here's a simple installation guide for our plug and play motorized glass floor hatch for the purposes of pre-sale information :
-
First, make sure you have all the necessary tools and equipment on hand- spirit level, and screwdriver set.
-
Carefully place the hatch into the pre-prepared floor void, ensure level and attach the hatch to the floor using perimeter screws.
-
Install the wall switch in the desired location.
-
Connect the actuators and wall switch to the control box, with the plug and play fittings.
-
Connect the control box to a standard power outlet or electrical socket using the included power cord.
-
Use the remote controls or wall switch provided to test the hatch and ensure it's functioning properly.
-
If needed, follow the user manual to customize the hatch's settings and operation to your specific needs.
And that's it! With our plug and play motorized electric glass floor hatch, installation is quick and easy, so you can start enjoying its benefits right away. If you have any questions or need further assistance, our support team is always here to help.
You can obtain a quotation for our electric glass floor system and order online here : DioMet Electric Cellar Door
Contact us with your hinged glass floor / wine cellar door enquiry 0114 243 9009 or email us sales@diometonline.co.uk
Please login to Comments

